This method is not strictly tempering the chocolate – it’s more mindful melting!
It still produces great results if done properly, with the right sort of chocolate.
All you need is a microwave! You may have burnt chocolate in the microwave before but follow these simple steps and you will have great results from now on! If you do have a disaster with your chocolate, take a look at some tips for fixing things.
Here’s how to ‘temper’ chocolate at home:
- Always use a plastic bowl (glass bowls hold too much heat and will eventually overheat the chocolate).
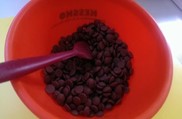
- Use a minimum of 300g of good quality chocolate – chopped into small even-sized pieces. You can save any leftover chocolate you don’t use in an airtight container for another time. Buy your chocolate in button-form, it will save all the chopping!
- Put the chocolate into the microwave on full power for very short bursts at a time. Initially 30 secs to 1 min (or slightly longer for bigger volumes). Between each burst stir your chocolate, even if it has not started to melt yet – still give it a good stir.
- It’s very important to get a lot of movement into chocolate – so keep stirring away, it will work wonders for the finished look!
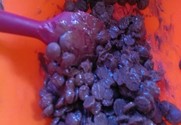
- As the chocolate starts to melt, reduce the bursts in the microwave to 10-15 seconds. Stir every time you stop to see how the chocolate melt is progressing.
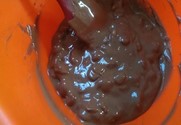
- When the chocolate has almost melted, but there are still some un-melted lumps present, stop putting the bowl into the microwave. Now stir until the heat of the chocolate has melted the remaining lumps in the bowl.
- Another good ‘temperature’ test is to put your hands around the outside of the plastic container. You should feel almost no heat whatsoever. The chocolate should be about the same as the temperature of your skin.
- If the melted mixture feels too warm, then add some more chocolate and stir to melt the freshly added chocolate. Use the residual heat of the melted chocolate. Don’t put the bowl into the microwave again! If you can’t melt all of the freshly added chocolate, then pop the bowl into the microwave again for just a few seconds and repeat as above.
- The chocolate will not last very long in this state, it will start to get too thick to work with. Pop it back in the microwave for a few seconds to bring it back again. Be careful, it’s very easy to overheat!
- If you make the chocolate too hot, you can add more fresh chocolate to the mix to bring the temperature back down again, as mentioned in point 8 above.
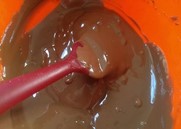
- This will produce chocolate that you can use for moulds, piping, or dipping. It will seem quite thick in consistency – the bigger the quantity of chocolate, the longer you will have to ‘work’ with it.
- Remember to leave your chocolate creations at room temperature to set (in a room that is not above 20°).
- You should ideally store chocolate in a cool, dark place and not in the fridge. Putting chocolate in the fridge can cause it to ‘bloom’ – where you will see white marks forming on the surface where the sugar and/or cocoa butter comes to the surface.
- Bloom occurs because the chocolate has not been tempered properly, or the room is too warm when it is setting, or indeed it is cooled too quickly. It is still safe to eat, it just doesn’t look as appetising – ‘see what to do when it goes wrong for some tips on recovering from this scenario!
Finally, come and share your creations with us all on my Facebook page! Enjoy