How to ‘temper’ chocolate at home

How to ‘temper’ chocolate at home

This method is not strictly tempering the chocolate – it’s more mindful melting!

It still produces great results if done properly, with the right sort of chocolate.  

All you need is a microwave! You may have burnt chocolate in the microwave before but follow these simple steps and you will have great results from now on!   If you do have a disaster with your chocolate, take a look at some tips for fixing things.

Here’s how to ‘temper’ chocolate at home:
  1. Always use a plastic bowl (glass bowls hold too much heat and will eventually overheat the chocolate). 
  2. Use a minimum of 300g of good quality chocolate – chopped into small even-sized pieces. You can save any leftover chocolate you don’t use in an airtight container for another time. Buy your chocolate in button-form, it will save all the chopping!
  3. Put the chocolate into the microwave on full power for very short bursts at a time. Initially 30 secs to 1 min (or slightly longer for bigger volumes). Between each burst stir your chocolate, even if it has not started to melt yet – still give it a good stir. 
  4. It’s very important to get a lot of movement into chocolate – so keep stirring away, it will work wonders for the finished look!
  5. As the chocolate starts to melt, reduce the bursts in the microwave to 10-15 seconds. Stir every time you stop to see how the chocolate melt is progressing. 
  6. When the chocolate has almost melted, but there are still some un-melted lumps present, stop putting the bowl into the microwave. Now stir until the heat of the chocolate has melted the remaining lumps in the bowl. 
  7. Another good ‘temperature’ test is to put your hands around the outside of the plastic container. You should feel almost no heat whatsoever. The chocolate should be about the same as the temperature of your skin. 
  8. If the melted mixture feels too warm, then add some more chocolate and stir to melt the freshly added chocolate. Use the residual heat of the melted chocolate. Don’t put the bowl into the microwave again! If you can’t melt all of the freshly added chocolate, then pop the bowl into the microwave again for just a few seconds and repeat as above.
  9. The chocolate will not last very long in this state, it will start to get too thick to work with. Pop it back in the microwave for a few seconds to bring it back again. Be careful, it’s very easy to overheat! 
  10. If you make the chocolate too hot, you can add more fresh chocolate to the mix to bring the temperature back down again, as mentioned in point 8 above. 
  11. This will produce chocolate that you can use for moulds, piping, or dipping. It will seem quite thick in consistency – the bigger the quantity of chocolate, the longer you will have to ‘work’ with it.  
  12. Remember to leave your chocolate creations at room temperature to set (in a room that is not above 20°).
  13. You should ideally store chocolate in a cool, dark place and not in the fridge. Putting chocolate in the fridge can cause it to ‘bloom’ – where you will see white marks forming on the surface where the sugar and/or cocoa butter comes to the surface. 
  14. Bloom occurs because the chocolate has not been tempered properly, or the room is too warm when it is setting, or indeed it is cooled too quickly. It is still safe to eat, it just doesn’t look as appetising – ‘see what to do when it goes wrong for some tips on recovering from this scenario!
chocolate callets in a plastic bowl with stirrer
even-size chocolate
Chocolate callets in a plastic bowl
Keep stirring
Melting chocolate in plastic bowl
Melting callets
Melting chocolate in a plastic bowl
Almost there

Finally, come and share your creations with us all on my Facebook page! Enjoy

10 surprising things you will learn about yourself from running your own business

10 surprising things you will learn about yourself from running your own business

Ever dared to dream about running your own business? 

All your focus is on how good you are at making/doing your thing. You will be feeling some fear, wondering if you are good enough to attract people to buy from you. Are you brave enough to take it further? 

Starting a business is much like becoming a parent for the first time. You will have had time to prepare and get ready to ‘birth’ your business idea, read books and listened to sound advice, and some not-so-sound advice too (how many people have told you starting a business is a bad idea? More on this below….). Start running your own business and you will be amazed at the things that are about to happen. 

Just like parenting, we have no clue what is about to unfold, we learn as we go. No child behaved as per the book, and no business journey will be just as you planned.

Here are 10 surprising things about running your own business. Things you’ll come to realise about yourself. Personal growth. The wonderful opportunities. The sheer magic that will open up to you…

YOU are BOSS material

Lady holding a large white mug that says 'Like a Boss'
 Step up and discover your true potential…

Say goodbye to the old you and unleash your vision and passion onto the world, your way. You will:

  • Set the tone and ‘personality of your business.
  • Make all the decisions.  
  • Take total responsibility for everything – good and bad.
  • Decide what you do, when and with whom

Once you become the boss there’s no going back!

YOU can live with FEAR

A bubble containing words of encouragement
 Everything you’ve ever desired is on the other side of fear…

Understand that however uncomfortable it feels, it’s a sign that you are doing things right.  

You are growing and stretching comfort zones and on the other side of fear is learning, growth, fulfilment and an incredible sense of achievement.

Recognise fear as your friend and you will fly.

YOU can change your STORY

 Forget one day, it’s day one…

You’ve been telling yourself so many stories about what you are able to do. Or, more likely, not able to do. As time goes on you realise that’s all they are – stories.  

What do you tell yourself you’re rubbish at?

Or not willing to do? 

Tell yourself a new story. 

Instead of saying “I’m rubbish at presenting”, or “I never do lives – I hate them.”

Say instead, “I’m going to follow some experts and improve my presenting skills.”  

Or “I challenge myself to do one live each week and see how I get on.”

Hey, you might even learn to love the thing you’ve avoided the most!

YOU can say NO

 Empower yourself to do what you truly want to…
Blackboard with the words time for change written on in white chalk

Running your own business, you get to stick to your principles. You decide who to work with. And you decide when it’s not worth the time and effort.

You find yourself agreeing to everything, scared to turn work down at the outset. Remember why you started, what you wish to achieve, how you intend to get there, exactly what don’t you want to do – and stick to it! 

It’s very powerful to say no when you are saying it with good reason. You are not missing an opportunity if it’s not what you want. Saying no means you are freeing time to do the stuff you love.

YOU can take a RISK

 If you win, you win, if you lose, you learn…

Can you spot potential? 

Will this opportunity lead you down a new path that you have not thought of before?  

Nothing ventured, nothing gained, and we learn so much from our mistakes.

Say ‘yes’ – without knowing exactly how you will achieve what you have been asked to do. You will find a way. Once you have committed to deliver, you will be amazed at how your brain goes into overdrive. You find who and what you need to make it happen. You make that thing you thought impossible – possible.

YOU can be PROUD

 Even if it’s a disaster darling, you are at least trying…
Woman in tutu jumping into the sky with a wand in her hand

You are about to be featured in the press. Invited to speak on a radio show. Appear on TV. Give a talk or presentation to a large group. Enter that competition and win awards. These are all things that have happened to me, so now it’s your turn.

I gained some fabulous PR by writing off to the local press. I engaged with journalists on social media and got featured in The Sun and The Independent. I have won several Entrepreneurial and Customer Service awards and been on numerous radio shows and TV. Go make yourself proud.

YOU have PURPOSE

 Sometimes s**t happens – you have something meaningful to get lost in…

This wonderful tapestry we call life, has a habit of throwing a curveball. Bereavement, separation, illness, hardships – we all face them at some point.  

Running your own business means you have something to focus on and dedicate yourself to when things are really difficult. It can be a wonderful and welcome distraction. 

It’s absorbing and interesting and all yours and you can put as much (or as little) into it as you wish. 

When life happens, you have something to distract you or engage you or something you can leave alone for a bit. 

Whatever it takes.  

YOU will GROW

 No more shrinking to fit things you’ve outgrown…
Picture of a small yellow bird on some purple flowers in nature

Running your own business is an education. You will expand your mind, grow and develop yourself as much as your business.  

You will find mentors, organisations, and groups that support and challenge you. You will learn new skills, move with technology (you have no choice), speak, write, and create new products/offerings for your business.

You will begin to support and mentor others too as they seek your counsel.  

There is no standing still, you are either shrinking or growing.

YOU will build your IDENTITY

 It emerges from within when you dare to show up…

What’s your purpose?

What now that the all-consuming responsibilities have changed?

Did you lose yourself and your confidence along the way?

Running your own business builds your identity. You become known as the ‘whatever you are doing’ lady or man. You achieve goals. You gain a sense of achievement. You are working in a way that you enjoy. You are authentic and true to your values. It builds your confidence and you discover yourself again.

YOU will have FUN

 Time flies…
Disco glitter ball

It’s not all about running the business. 

You work and play on your terms.  

A day off to do something you fancy. A long lunch and catch up with a friend. Holidays when it suits, longer trips, or lots of smaller trips instead – pop them in the diary and work around it.  

You don’t need permission from anyone but yourself.

You may have to work longer or ideally smarter to achieve/afford your time off but honour yourself and protect your fun/leisure time. 

If running your own business means conquering fears, exploring opportunities, growing as a person, and realising just some of your amazing potential – how could you not give it a go?

As mentioned earlier, so many will try and put you off starting at all….. 

They might believe it’s a risky strategy.  

They might believe it’s the wrong time.  

Or have you simply made them jealous because they’ve never dared to try?  

Doing this alone is never easy. We are prone to overthink, procrastinate, listen to the doubters and give up.  We are always better together, as long as we choose the right people to support and encourage us along the way. Visit my Facebook page for more inspiration!

I started my business journey with chocolate. Imagine if you worked with chocolate, how tasty might that be?

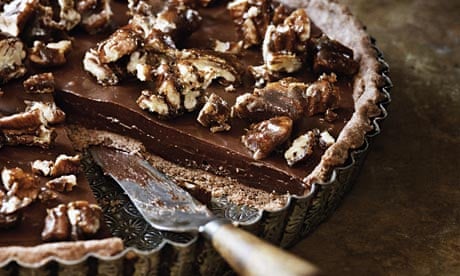
Decadent Chocolate Tart

Decadent Chocolate Tart

Chocolate and pecan tart
Photograph: Anders Schønnemann/Kyle Cathie – The Guardian
Ingredients

For the chocolate pastry

  • 175g butter
  • 75g golden caster sugar
  • 2 egg yolks
  • 250g plain flour
  • 20g cocoa powder

For the filling

  • 200g Madagascan 64% dark chocolate, broken into pieces 200ml whipping or double cream (whipping cream gives a slightly lighter texture)
  • 200g light muscovado sugar
  • 10g Maldon sea salt

For the topping

  • 100g caster sugar
  • 1 teaspoon Maldon sea salt
  • 100g pecan halves
Method

For the pastry; cream together the butter and sugar with a wooden spoon until light and fluffy. Add the egg yolks and 35ml water and mix well. Then add the flour and cocoa powder gradually until a paste is formed. (If you prefer, this can all be done in a mixer or food processor.) Wrap the pastry clingfilm and pop in the fridge for an hour.

Roll out the pastry until it is about 5cm bigger than your tart tin (your tin should be 24 cm diameter by 2.5cm deep) – sprinkle the surface with flour to avoid it sticking! Line your tin with the pastry, then pop it back in the fridge for another 15 minutes.

Preheat your oven to 180°C. Blind bake your pastry for 20 mins (line the tart with baking parchment and add your baking beans). Lift out the beans and bake for a further 5 + minutes, until the base is dry. Allow to cool.

For the filling; put the chocolate, sugar, cream and sea-salt in a glass bowl – place it over a pan simmering water, ensuring the bowl is not touching the water, and melt together, stirring until glossy and thick. Pour onto your pastry base and once cooled, pop back in the fridge for two more hours.

For the caramelised nut topping; heat a saucepan until warm and add the sugar, gradually mixing until you have a golden liquid caramel. Add the salt, give it a good stir. Pour in the pecans and, mixing thoroughly, quickly pour the mixture onto a parchment sheet and spread out. Allow to cool completely, then break or chop up the nuts into shards or chunky pieces to sprinkle over the tart.

Dawn Says
Dawn Fry

This is so rich, and so amazing, making your taste buds really zing. If you want to offer a bit of a show-off dessert and really please your chocoholic friends – this is the pudding for you. It needs a lot of cooling time, so you may wish to start the day before, making the pastry element ahead of the rest.
Inspired by the recipe Sea-Salted Chocolate and Pecan Tart from ‘Adventures with Chocolate’ by Paul A Young

This is number one is my top of the chocs recipes to make at home. For more inspiration pop to my facebook page.

If you love chocolate, have you ever considered what it might be like to make chocolate your business?

Mocha Mousse

Mocha Mousse

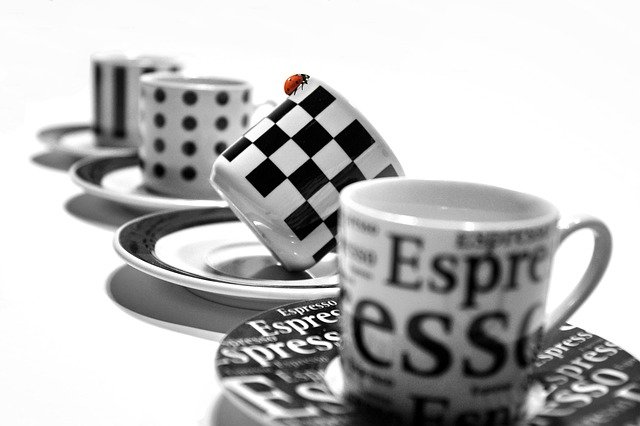
assorted espresso cups
Ingredients
  • 75g dark chocolate
  • 25g dark muscovado sugar
  • 1 tablespoon espresso (strong, freshly brewed)
  • 2 eggs, separated
  • 50g white chocolate
  • 80 ml whipping cream
  • 1 teaspoon roasted coffee beans
  • 1 teaspoon roasted cacao nibs
Method

Put a glass bowl over a pan of simmering water, ensuring the bowl is not touching the water – melt the dark chocolate and remove from the heat, allowing it to slightly cool.
Make your espresso, and dissolve the dark sugar in one tablespoon of coffee. Leave to cool.
Using the egg yolks (you will use the egg whites later), whisk these in a large bowl and add the melted chocolate and coffee.
In a separate bowl (ensure the bowl is clean and grease-free) whisk your egg whites until they form stiff white peaks. Gently fold in the chocolate/coffee mixture, folding this in gradually with a metal spoon.
Divide this mixture between your espresso cups (it will make 6 – 8 cups, depending on their size). Pop these in the fridge to set.
Now melt the white chocolate (in the same way as the dark chocolate earlier). Allow this to cool. Pour your cream into a bowl and whisk until it forms soft peaks (do not over whisk as this will make the mixture too stiff). Fold your white chocolate into the whisked cream. Spoon this onto your chilled mocha mousses. This looks like the ‘crema’ on your coffee!
Finally, crush your coffee beans and cacao nibs in a mortar and pestle and sprinkle on top of each mousse. Chill the mousse until required. It’s good to allow them up to room temperature again before you eat them, and they will keep in the fridge for a couple of days.

Dawn Says
Dawn Fry

The brilliant thing about these is you can make them ahead, and they look so pretty when you serve them. I like to use different espresso cups and have an eclectic mix on the table. I might have odd sizes too so you can cater for those that can manage a little more than others!
Inspired by Macchiato by Claire Burnet from her debut book ‘Chococo chocolate cookbook’.

This is number two in my top of the chocs recipes to make at home. For more inspiration pop to my facebook page.

If you love chocolate, have you ever considered what it might be like to make chocolate your business?

Dark Chocolate Cake

Dark Chocolate Cake

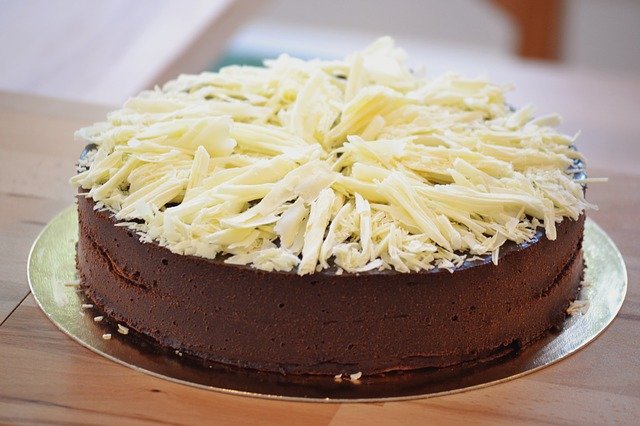
Dark chocolate cake with white chocolate shavings
Ingredients
  • 180g 100% cacao chocolate, grated
  • 250g unsalted butter
  • 6 eggs
  • 50 light muscavado sugar
  • 125g golden caster sugar
  • 100g ground almonds

For the icing:

  • 250ml double cream
  • 75g golden caster sugar
  • 90g 100% cacao chocolate, grated
Method

Preheat the oven to 170°C.
You will need a 25cm springform cake tin, lined with baking paper.
Put a glass bowl over a pan of simmering water, ensuring the bowl is not touching the water – melt the grated chocolate and butter together and remove from the heat.
Beat the eggs with the two sugars (using your mixer preferably) until pale and doubled in size.
Once cooled, gently stir the melted chocolate into the eggs with a large metal spoon, and then fold in the ground almonds.
Pour the mixture into your tin and bake for 35 mins, or until a knife inserted into the centre comes out clean. Leave the cake to cool in the tin.
To make the icing, heat the cream and sugar together until it comes to a light simmer. Remove this from the heat and wait one minute (exactly, put the timer on!). Stir in the grated chocolate until it has melted. Leave this to cool and spread over the cooled cake. You can add shavings or other adornments to your finished cake as you wish.

Dawn Says
Dawn Fry

There is no sweetness in the chocolate as it is 100% cacao. You can add more sugar to taste. You can buy 100% cacao in most supermarkets. Look in the cooking aisle instead of the chocolate section. It does give a wonderful full chocolate flavour. I love the intensity as I prefer things less sweet!
Inspired by the Cloud Forest Chocolate Cake in Willie Harcourt-Cooze’s book ‘Willie’s Chocolate Factory’

This is number three in my top of the chocs recipes to make at home. For more inspiration visit my facebook page.

If you love chocolate have you ever considered what it might be like to make chocolate your business?

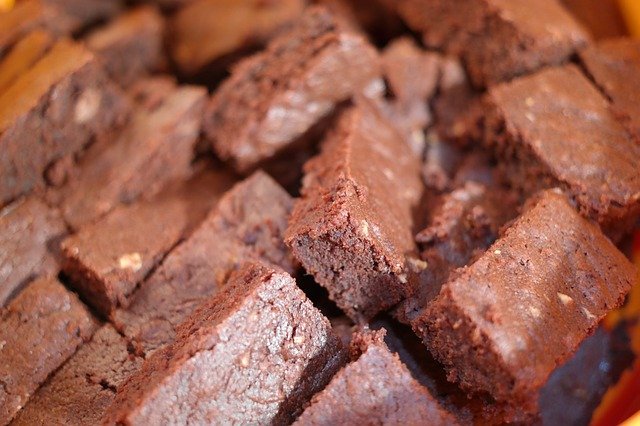
Chocolate Brownies

Chocolate Brownies

Chocolate brownies
Ingredients
  • 375g soft unsalted butter
  • 375g dark chocolate
  • 6 large eggs
  • 1 tablespoon vanilla extract
  • 500g caster sugar
  • 225g plain flour
  • 1 teaspoon salt
  • 300g chopped walnuts (in original recipe – I replace these with more chocolate!)
Method

Preheat the oven to 180°C
Line your tin with baking paper (approx 33 x 23 x 5 1/2cm for this quantity).
Melt the butter and chocolate together on low heat, in a large heavy-based saucepan. Give it a stir now and again and once melted, remove from the heat to cool.
In another bowl beat the eggs with the sugar and vanilla – set aside.
Measure your flour in (yet) another bowl and add the salt.
Pouring the melted chocolate mixture in a slow and steady stream, beat into the eggs and sugar mixture (make sure the chocolate has cooled enough before you do this element)!
Now add your flour and stir to mix.
At this point, I mix it up a bit. I don’t add nuts to my brownies (I love them but the rest of the family prefer more chocolate) if you were using the nuts you would add them now!

Try adding 100-200g of chocolate buttons instead of nuts (depending on the quantity you are making). This might be white, caramel, or ruby chocolate. Dried cranberries and white chocolate are good at Christmas.

Why not try a coffee, cardamom, and caramel combo – it’s delicious?
Dissolve a heaped teaspoon of coffee granules in a tablespoon of hot water (or use coffee essence to taste). Add this to the melted chocolate mixture when you remove it from the heat. Split 4-5 cardamom pods and extract the seeds, grind the seeds in a pestle and mortar and add with the flour and 100g of caramel chocolate buttons.

Combine well and then pour into the lined tin.

Bake for about 25 minutes. I usually check after around 20 mins – if you bake them too long, they lose the gooey essence that makes them brownies.
When it’s ready, the top should be dried to a paler brown crackle (they will cook a little more as they cool). Pop on a cooling rack and enjoy the smell that fills the kitchen.

Dawn Says
Dawn Fry

I never make this much – I usually halve the recipe. Sometimes I even do a third – otherwise, I’ll eat them all. I’ve taken to writing the different quantities in my cookbooks. I don’t have to keep working the difference out every time!
Inspired by Nigella Lawson’s brownie recipe as appears in ‘How to be a Domestic Goddess.’

This is number four in my top of the chocs recipes to make at home. For more inspiration pop to my facebook page.

If you love chocolate, have you ever considered what it might be like to make chocolate your business?

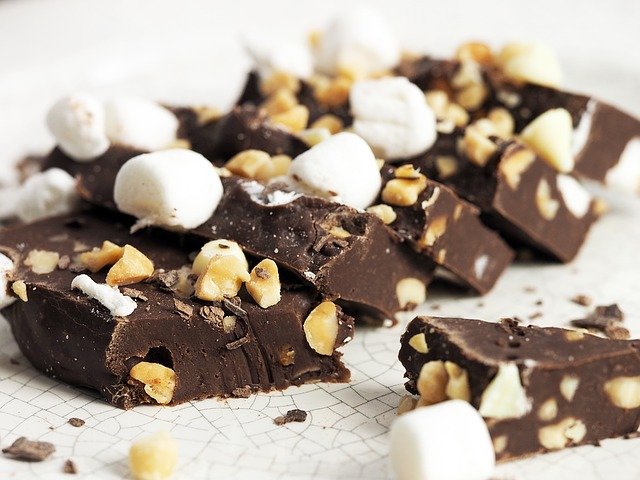
Chocolate Crunchy Nut Squares

Chocolate Crunchy Nut Squares

Chocolate crunchy nut squares with mini marshmallows
Ingredients
  • 200g dark chocolate
  • 100g milk chocolate
  • 125g unsalted butter
  • 3 x 15ml tbsp golden syrup
  • 250g salted peanuts
  • 4 x 40g Crunchie bars
  • 1 baking or foil tray, approximately 30 x 20 x 5 cm. (if using a baking tray, line with parchment or greaseproof paper)
Method

Add chopped chocolate, butter, and syrup to your saucepan and place over low heat. Bash up your crunchies, measure out your salted peanuts and mix together in a separate bowl. Pour the melted chocolate mixture over the nut/honeycomb mixture, stir well and pour into your tin. Smooth out (add extra goodies if you wish, like mini marshmallows or edible glitter) and leave to cool. Once cooled, pop in the fridge for a few hours, then remove and cut into squares. Bet you can’t eat only one square!

Dawn Says
Dawn Fry

Use good quality chocolate. Minimum of 70% cocoa for the dark and 30% cocoa for the milk chocolate. You can buy some supermarket own-brand chocolate for this.
I buy honeycomb in chunks for my chocolate workshops – so I use this instead of buying Crunchie bars. I add a little extra milk chocolate too to compensate!
Inspired by Nigella Lawson’s Sweet and salty crunch nut bars, as appears in ‘Kitchen’

This is number five in my top of the chocs recipes to make at home. For more inspiration pop to my facebook page.

If you love chocolate, have you ever considered what it might be like to make chocolate your business?

Creating some ‘WOW’ requires more than just chocolate!

Creating some ‘WOW’ requires more than just chocolate!

I love people (and chocolate too of course) which is why I created The Melting Pot. Creating the best possible experience for customers is a true passion of mine. A workshop environment provides a golden opportunity to really cherish every guest and ensure they leave happy (with bags filled with chocolate)!

A group of people at a hen party

The Customer Journey

The experience itself is just one part of a journey for my customers – one that starts long before I’m aware of their presence. They will be experiencing my business via my website and social media platforms. I must build a relationship with them (whether they decide to take part in a workshop or not). I need to keep in touch over a period of time, strengthening our connection until they are hopefully ready to buy.

Your Business Personality

I work hard at creating the right business personality for The Melting Pot. This involves first impressions. The way I present myself and my business. How I act on social media, my writing style, aiming for quick response times, sending regular newsletters, and of course, my workshops. I’m fascinated by learning more so I always ask for feedback too. Gaining insights from my customers means I can continually review, hone and improve what I offer.

Getting Sticky Customers

One business entrepreneur once said to me “I want what you’ve got in your business – I can’t quite put my finger on what it is, but I want it in mine.”

Never one to pass up a challenge, I set to identify all the elements that go into creating a great customer experience.

I created a workshop called Getting Sticky Customers. We cover all the basics on getting good at creating the best customer experiences and I added chocolate into the mix too! The aim is to get our customers to stick around while we might get a little sticky with the chocolate too.

What makes great customer experience?

My aim is on building the best relationships with clients (and creating a ‘WOW moment’ now and again to really make me stand out from the crowd). It starts by doing exactly what it says on the tin. If you mention it, it needs to work in the way it’s described/expected. Simples but so many companies don’t do this. Until this element is nailed, don’t bother trying to make your customers go WOW as it won’t work.

In my opinion, it’s not about theory, spouting statistics on customer retention, and yet more examples of bad customer service stories (yawn, we’ve heard them all before). It’s about getting in the right mindset, sweating the small stuff, and noticing examples of what we CAN DO to create some WOW moments for customers. It’s about getting inspired!

Mindset Matters

Quotation from Maya Angelou

I believe the biggest factor is my mindset – how much genuine emphasis I put on making things the best for my customers really matters. If anyone is going to part with their hard-earned money and spend it with me, I really care that I do my best for them. That has to come above anything else.

Then I keep a close eye on all the operations, customer interactions, and managing expectations. If you spell out how something is going to work, the customer understands the process and is not left to worry. The way I act on the phone, at events, such as conferences or networking, face-to-face meetings, and via written word all count. I am always the face of the business in whatever setting I am in.

I need to ensure the basics are working properly first – it’s as simple as doing what I promised I would. If I can’t do that I need to hold up my hand and explain why. I then need to keep in touch and keep the customer informed of what’s happening and when to expect a result (or not). Only then can I look at how I might create some WOW for customers.

This has to be done authentically, and I have to be myself, albeit a ‘business-personality’ style version of me! Don’t try and be false, or act in a way you can’t sustain. That’s just exhausting and people will see through it eventually.

Add Chocolate

Mention chocolate and some of the work in getting people excited is done for me, I do agree. But get the experience wrong or treat the customers badly and no amount of chocolate will win them over.

If you are interested in working with chocolate, here are five reasons that might be of interest!

Chocolate therapy

Chocolate therapy

I welcome groups of people to my chocolate tanks.  There are two tanks, each of which holds up to eight kilos of molten chocolate that has been tempered prior to their arrival and is ready for chocolate-making.

They may have booked onto a chocolate workshop, but the experience is really a chocolate therapy! Here’s why…..

Two tanks of chocolate

Chocolate aroma

The first thing people remark on is the smell.    I’ve been busy stirring and adding callets to the chocolate tanks to temper the chocolate. The whole space is filled with the aroma of chocolate!

Chocolate trance

It’s quite amazing the effect this has on everyone.  We do some fun activities at the outset, and people are giggling and letting their guards down, then finally we start to dip fillings into the chocolate tank.  As they dip, they reach a level of calm.  The sensation of dipping, smelling and making chocolates seems to seep into each of them and they relax completely.  They open up and share stories – the dipping process has a totally therapeutic effect on them. 

You can’t hide

Each participant places the chocolates they have made onto their mat and this shows their personality – without fail.  They might start with neat lines and order, but eventually they will reveal their true identity by the way they place and decorate their creations.  It’s quite something to witness!

I often refer to this element of the workshop as ‘chocolate therapy’! It amazes me every time and is a total privilege to offer.   It’s so rewarding to see the positive and rather magical effects chocolate has on people.

Sometimes life can be very harsh – for instance, I’ve worked with children who are unable to be in mainstream education and their short lives have already been difficult and complicated, but still the magic of chocolate will weave its spell and create a small moment of peace, calm and creativity for them. 

The healing powers of chocolate

A daughter bought her mother to me.  They had lost their husband/dad almost a year ago and the mother had hardly been out of bed.  Her daughter booked the workshop just to try and help her mum as the first anniversary approached.

We had a magical morning, working with others enjoying ourselves, being creative, supportive and having a bit of fun.  They were almost in tears as they left saying how good the experience had been for them.  What an honour to have helped in some small way in such circumstances.

Squeak, squeak

Often the excitement is palpable. 

A lady treated her best friend to a workshop for a significant birthday and didn’t reveal the surprise until they arrived.  I’ve never heard so many squeals, her total delight was present throughout her whole experience and it was completely infectious. 

Imagine making someone so happy and excited – it’s a wonderful feeling.

So working with chocolate goes far deeper than you could imagine and continues to be a total wonder to me – the way it can help, encourage, support and excite others is just incredible!

Catch up with other chocolate stories on my Facebook page.